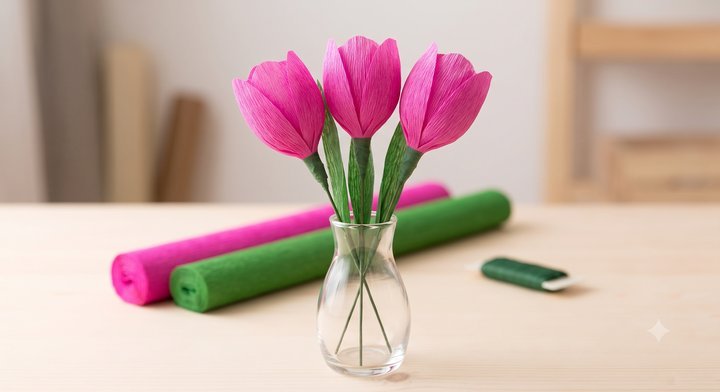
Making realistic tulips from crepe paper is a rewarding intermediate paper craft. The key is in stretching the paper to create natural, cupped curves.
Here is a step-by-step visual guide.
Step 1: Gathering the Material and Cutting Shapes
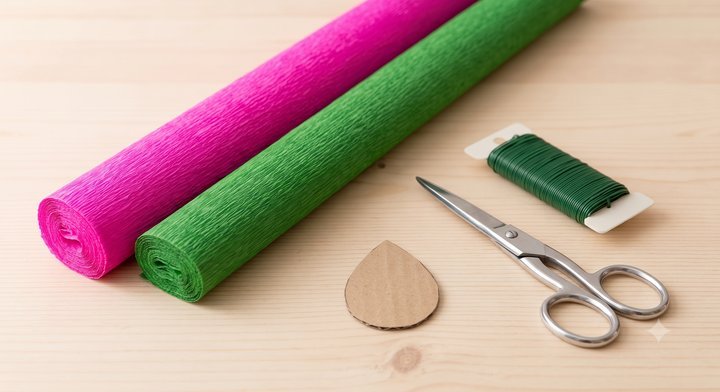
Before beginning, you must gather the specific materials essential for this flower. The quality of the crepe paper matters; a heavier 180g crepe is best for holding the petal shape. As shown in the image below, you will need rolls of vibrant pink and green crepe paper, sharp scissors, a roll of green floral tape, and standard 18-gauge floral wire. You will also use a small, teardrop-shaped cardboard template (visible on the table) to ensure consistent petal sizes.
Cut six pink petals for each flower using the template, and two long, slender green leaves.
Step 2: Cupping and Shaping the Petals
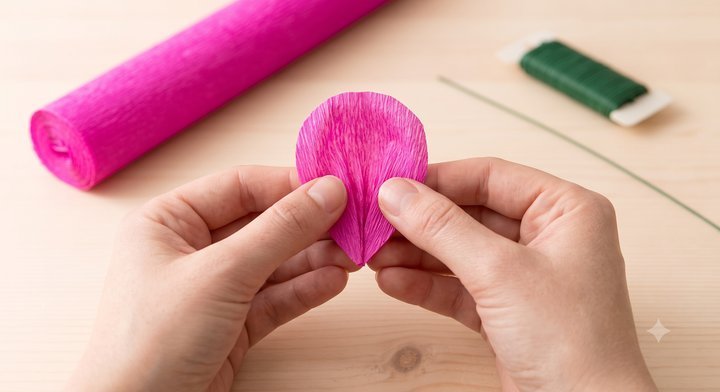
This is the critical step that gives the tulip its signature volume. Taking one of the cut pink petals (from Step 1), place your thumbs in the center. Gently but firmly stretch the crepe paper outwards. The grain of the paper must run vertically. This stretching cups the petal, making it curve inward naturally.
The close-up below demonstrates the thumbs creating that deep, realistic cup shape required for the tulip bowl. Once all six petals are cupped, they are ready for attachment.
Step 3: Forming the Stem and Attaching the Leaves
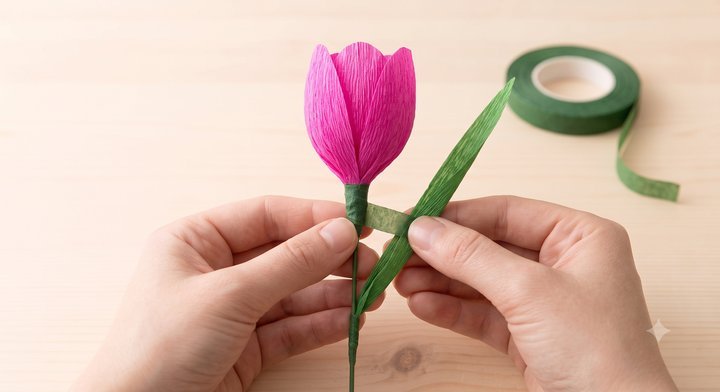
The assembly begins by taking the floral wire and creating a small loop at the top (this prevents the petals from sliding off). Wrap the first pink petal (from Step 2) tightly against the wire structure and secure its base with green floral tape. Remember that floral tape only becomes sticky when stretched.
Add the subsequent petals, overlapping them slightly to form the closed tulip shape. Once all six petals are secure, continue wrapping the floral tape down the wire. As shown in the image below, you must integrate the slender green leaves (cut from the green roll in Step 1) by wrapping the floral tape firmly around their base, attaching them seamlessly to the stem. The hands move smoothly, winding the tape downward.
Step 4: The Final Presentation
The flower is complete. Repeat the process to create a small, coordinating arrangement. The delicate texture of the crepe paper now resembles a real flower, with the cupped petals defining the beautiful tulip form.
Here, we see three completed pink tulips, identical to the assembly shown in the previous step, presented in a simple, clear glass bud vase. The soft lighting highlights the specific grain and sculpted form of the finished product.